
 Follow us on facebook

Our YouTube channel
.
Shortcuts to some of our pages:
.
.
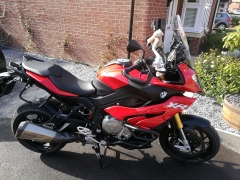 Dr Tigger's S1000XR
.
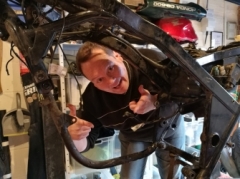
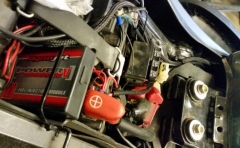
 BedPan's half resus
..
 Making a sump guard
.
 Circumnavigate Britian
.
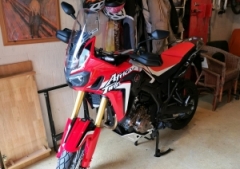 Africa Twin CRF1000L?
.
 Tarting up a Varadero

l
l


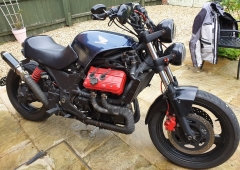
This isn't how best to make an aluminium sump guard for a Honda XL1000 Varadero -
it is just how Dr Tigger did it.
.
There are three ways to do something: the right way, the wrong way and the Dr Tigger way. The third is like the second but much faster.
.
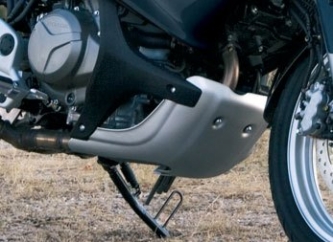 This is the Honda original sump guard - very thin pressed metal that I would not trust to stop a rock and also it is open over most of the bottom i.e. the sump and exhaust are not fully protected. Mr Honda, if you are going to sell this as an adventure bike then design it all as such. Actually, as most adventure bike riders never leave good quality tarmac I can understand why the rest of us are fleeced.
.
 .
.
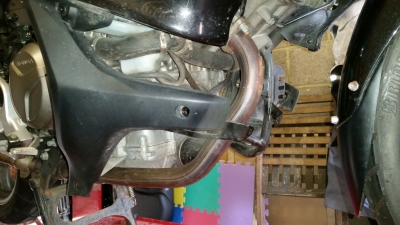
Warning! Bike porn. Betty with her undergarments removed. As you can see, it is the engine's sump, front cylinder exhaust and oil filter that need protecting. There were four mounting points on brackets fixed to the engine.
.
.
 .
.
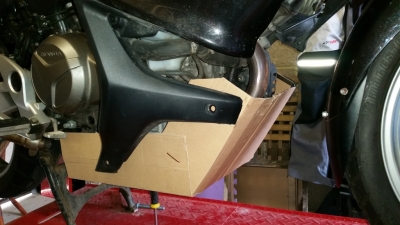
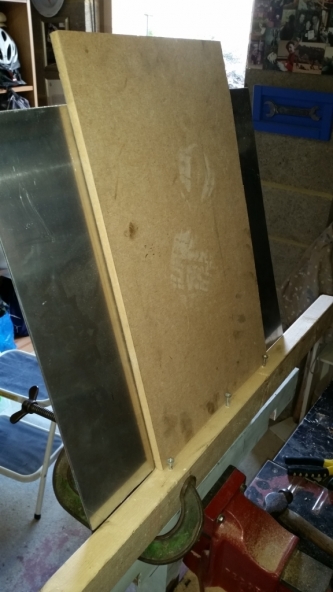
Despite what it looked like I didn't first try to make the new sump guard out of cardboard. This was the pattern I used to help me figure out the design and the net for the final shape. Without this I definitely would have ruined my first piece of aluminium.
.
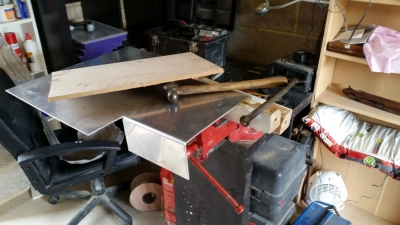 So the first thing was to figure out how to bend the 4mm aluminium. Here I had made two cuts with a hacksaw and then placed wood either side of the bend line. I then placed a few screws in the wood I was bending the metal away from. This was so I could put a larger piece of wood between the metal and screws to use as a lever.
.
 .
.
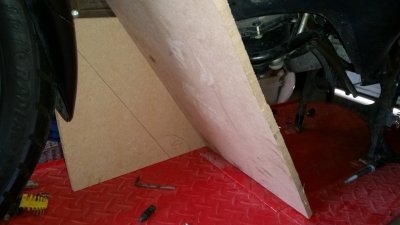
Here I used some scrap of board to mimic the front of the sump guard and used this to be able to mark and measure the angle of bend I needed to put into the aluminium to make the bottom leading edge.
.
.
.
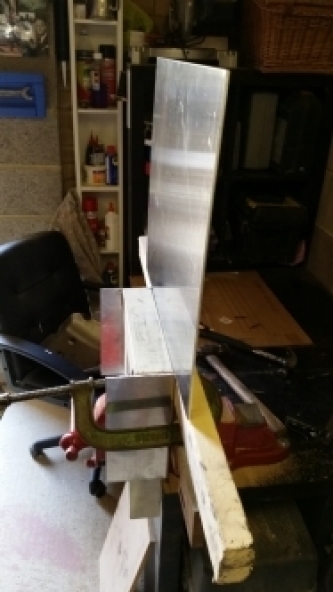
You can see below the bending process in a little more detail
 .
.
.
.
.
.
.
.
.
.
.
.
.
.
.
.
.
.
.
.
.
.
.
.
.
.
.
.
Let me make this perfectly clear; I do not advise you to follow my process in any way, shape or form. Damage yourself and it is entirely down to you, not me. To illustrate this I'll admit that when I was making one of the side bends I stood on the contraption to get the power required to bend the metal. I thought the metal was giving but actually it was my vice being pulled out of my work bench. We all fell to the ground and I bled from a finger and a leg for quite a while. Be warned and I'd probably use 3mm aluminium if I did this again.
.
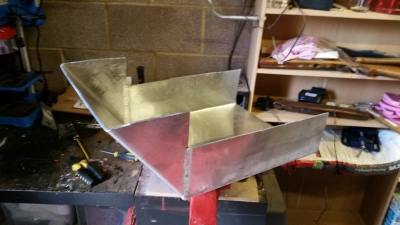 So, having put all the major bends in I took the outline sump guard back to Peterborough Sheet Metal where I originally purchased the aluminium. They kindly did the two 4inch welds you can see here for a tenner; having only charged me £20 for the aluminium in the first place. Nice folks, I recommend them.
.
 .
.
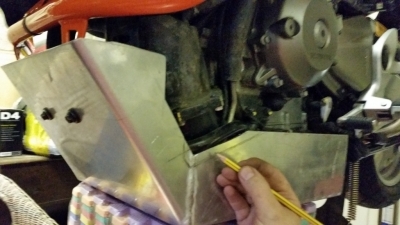
The next job was to offer the sump guard up and mark out the material to be removed to be able to get it to fit. Like before I cut out the aluminium with a hacksaw or jigsaw and sometimes by drilling a row of holes.
.
.
.
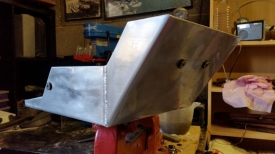
After a lot of fettling the sump guard was ready to be tried out on the road having rounded all the edges with a file and then 'wet 'n' dry'ed them. I used the original rubber mounted fasteners.
.
.
.
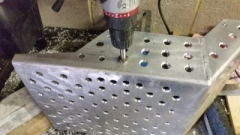
 As nothing fell off on the first 200mile test, the next step was to lighten the sump guard where possible by drilling holes in it. I used my small pillar drill where possible but the rest was done using my small cordless drill as I couldn't get my corded drill to run slow enough. This worked well but terminally strained my cordless drill.
.
 .
.
Once I'd drilled the 13mm vent holes (as this was the biggest size of bit my drills would take) I bought a 22mm HSS countersink and reemed each vent hole just for aesthetics.
.
.
.
.
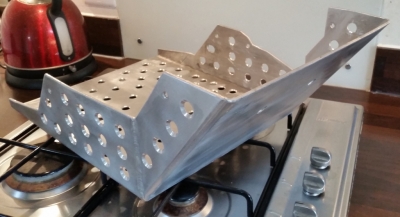
So once all the drilling was done and a quick 'wet 'n' dry' all over I was left with this, ready for painting. It did nicely match my kitchen hob which was always the plan.
.
.
.
 .
.
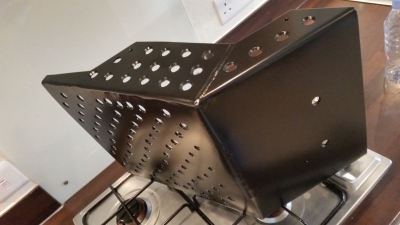
A quick powder coat and the sump guard was finished and ready to be mounted. Overall it was a bit heavier at 2.2kg compared to the 0.7kg original but this was more than covered by the lighter exhausts and the weight is nice and low down.
.
.
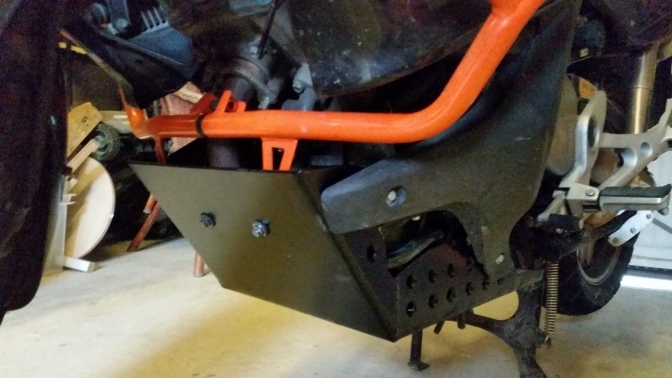
So, after a lot of time and about £30, not including the new tools I needed and the old ones I broke, Betty's belly looked better and was properly protected at last.
.
I don't have any plans or the cardboard net for this design but if I can be of any help with your project then pleae do drop me a line via our contact page. I do, despite selling my Varadero, still have this sump guard mounted on my garage wall. It is probably the best thing I have ever made bar my daughter.
Addendum:
In a bid to release funds to complete EDie, the Black Rat, I reluctantly sold the sump guard, leaving a bare patch on my garage wall. However, it has gone to a good home!
| Visitor Counter: | |||||||
 |  | |  | |  | ||