
 Follow us on facebook

Our YouTube channel
.
Shortcuts to some of our pages:
.
.
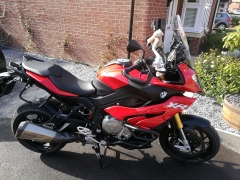 Dr Tigger's S1000XR
.
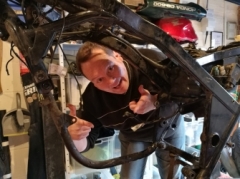
 BedPan's half resus
..
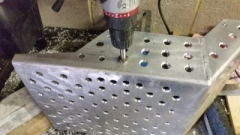 Making a sump guard
.
 Circumnavigate Britian
.
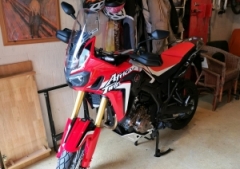 Africa Twin CRF1000L?
.
 Tarting up a Varadero
l
l


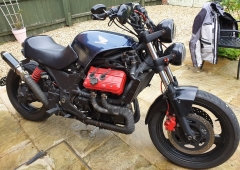
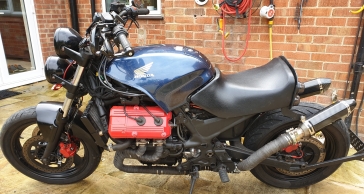
Bedpan - 1999 Honda Pan-european:
After the success of EDie there was no stopping us having another try. Overall we only lost about £200 on project EDie having sold her for £1300. We think that was a roaring success for our first project.
We were going wait until the end of the 2017 season for our next purchase but Dr. Tigger got chatting to a nice Welshman about his Pan-european and managed to negotiate buying her for £1000. Alas this was our entire budget so we quickly started stripping of bodywork and parts to flog on eBay.
Bedpan's name is just an anagram of what she is. Project B of ED riders; a PAN-european.
Bedpan was always intended as a 'proof of concept' for the ED Resus dept's project #3; the one that we hope will look good up close. Edie = good at 3m, Bedpan = good at 1.5m, project #3 = actually good finish. Bedpan was also intended to help Dr. Tigger explain his design plan as BigMac couldn't see it; mostly because Dr. Tigger could neither explain it or draw it!
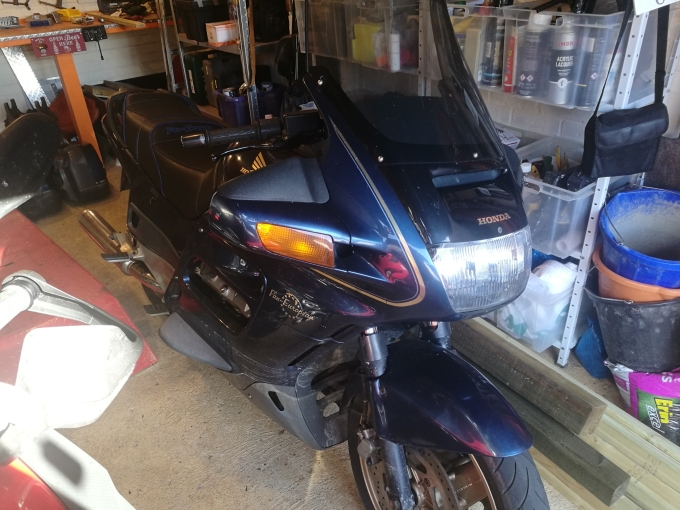
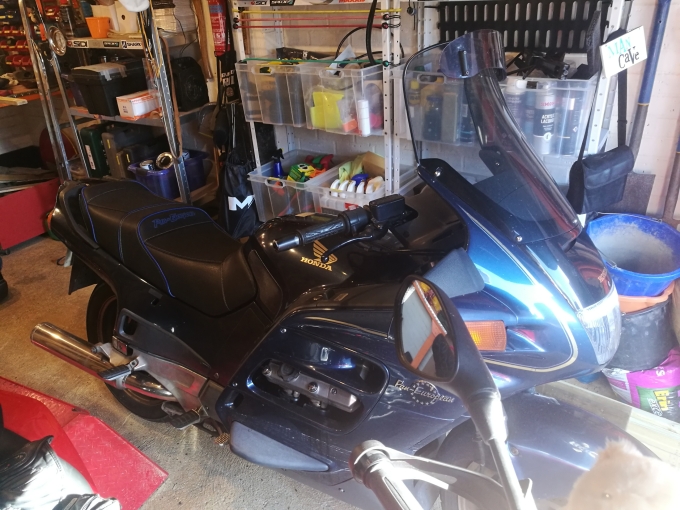
BedPan was definately showing signs of her years but she'd only covered 63k miles and everything worked. Moveover, despite her 300+kg kerb weight, she was a sweet ride; very comfortable but a little low down gruntless. Acceleration from 0-30, from 30-60 and from 60-90mph all took the same time!
After giving her a good fluids check over we used her every week or two over the rest of the summer as she was just such a good old bike but Dr. Tigger discovered the first job when riding BedPan to his GP teaching. The clutch gets progressively squidgy as she gets warm. After 30-40 minutes the clutch gets to the point of dragging and she's unrideable. Our best guess was that this represented air in the hydraulic system.
We changed the fluid and bled the system which made things a tad better but a new braided clutch line thankfully cured the issue but we'd already started stripping her back so the test ride took so improvisation to be legal!
Soooooo...... now that Bedpan had no problems it was time to make some after learning how to weld.
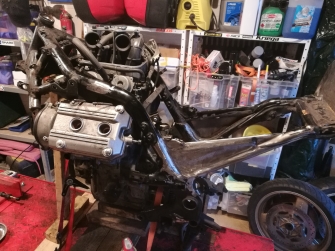
So the strip down started with the usual complications that required liberal application of WD40 and heat.
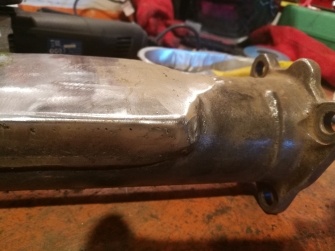
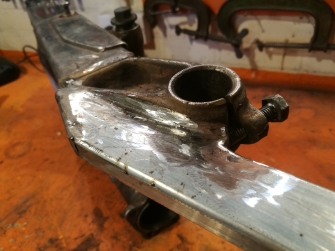
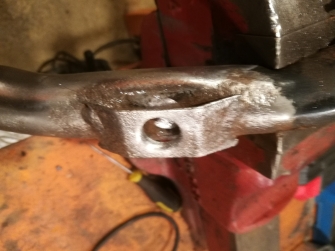
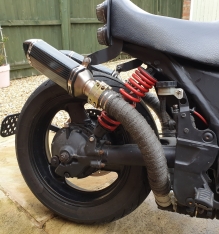
One major job we though likely to crop up would be to address the well known ST1100 problem of a rusting swing arm which Bedpan had although it looked relatively minor and an easy patch to replace so our new welding skills had their first proper challenge
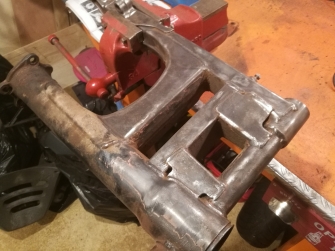
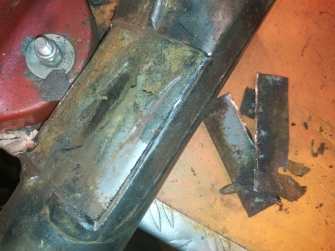
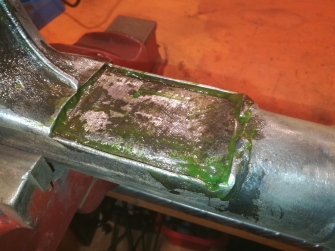
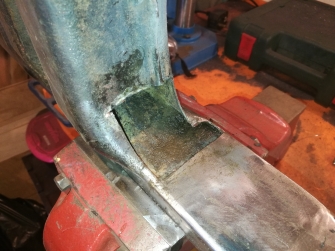
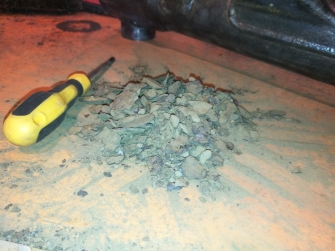
Alas, to the left of the last picture above, every time we tried to weld the last side it blew through revealing more rust so another patch was needed. Then every time we tried to weld the last side it blew through revealing more rust so another patch was needed. Then every time we tried to weld the last side it blew through revealing more rust so another patch was needed. the picture below is just some of the rust from the swing arm's inside. All was cleaned back and rust treated. Eventually and after a truely shocking about of Anglo-Saxon the swing arm was finally repaired and extended to give a rear wheel protector.
We had almost instantly run out of welding gas so all of this was welded with flux cored, gasless, wire. Amazing how inexperienced welding turns out once ground back!
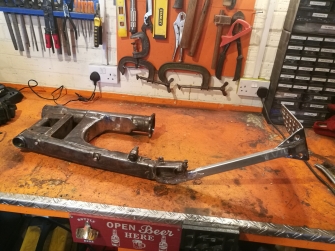
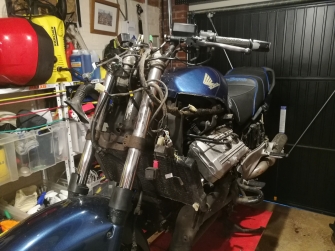
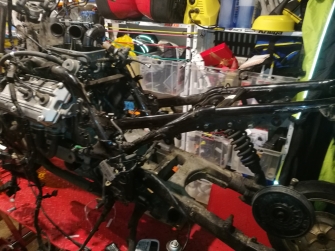
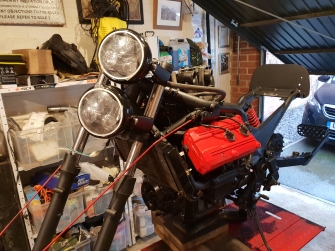
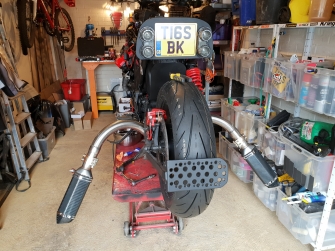
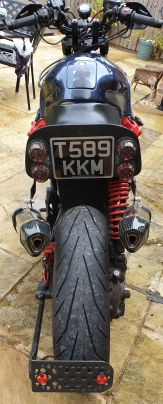
Now a little more confident with welding we charged ahead and chopped most of bedpan's rear frame off and welding in a new back.

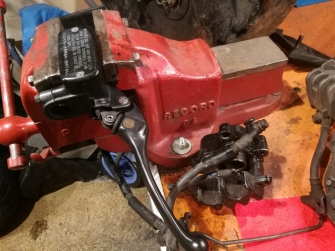
Because of scrimping we didn't need to disassemble the forks for powder coating but the rear suspension and brakes needed braking down as the spring was now the wrong colour and the rear brake had seized. This was no great surprise as it had been regularly locking up before but at least it wasn't as perished as the spring's rubber stop! The front brake lever and reservoir is being used in the picture to pump out the brake pistons.
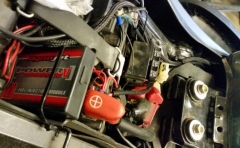
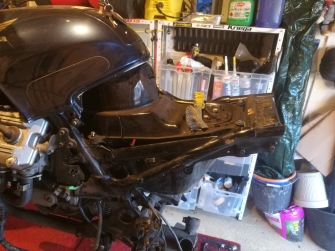
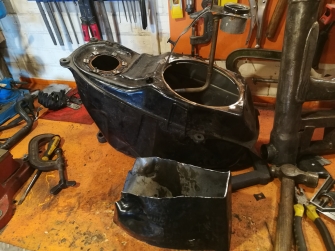
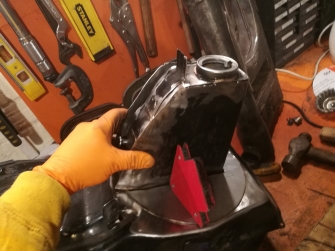
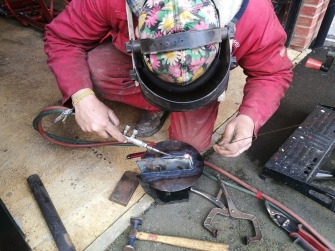
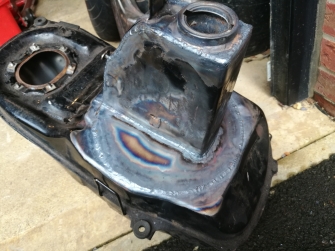
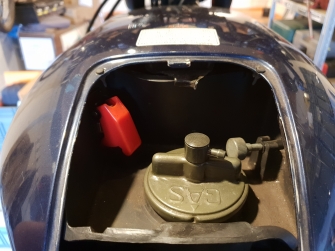
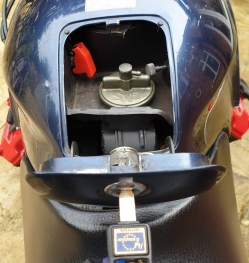
It very quickly dawned on us that removing so much of the bike would leave a rather large storage issue i.e. the need to find new homes for those components previously located at the back of the bike like the cooling expansion tank, the plethora of relays and the battery. Originally the plan was to put them all under a new faux tank but with everythign naked in front of us and better plan was to sacrifice part of the huge fuel tank. This would need welding well beyond us so we did the cutting and got Paul Chafer (top bloke) of Paul Chaffer welding to pop round and oxy-acetylene weld it.
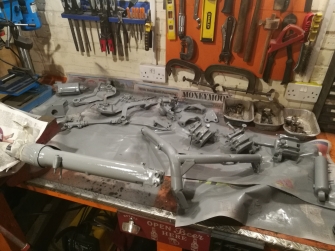
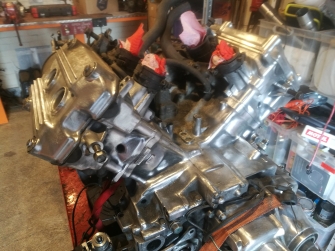
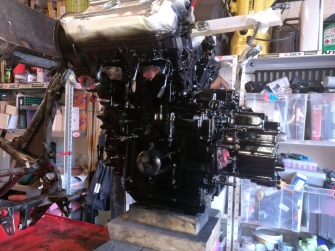
So now it was the frame and engine's turn for cleaning, rubbing down, rust treatment (only very little present on the frame) and paint. We simply choked up the engine and lifted the frame off it.
The frame really did need powder coating but, as before, we made do with rattle cans on primer and stone chip.
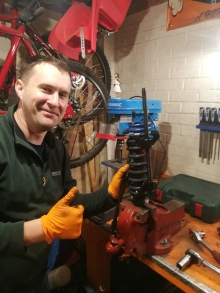
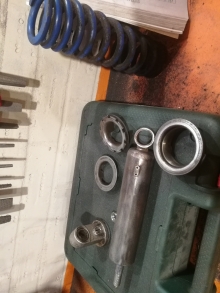
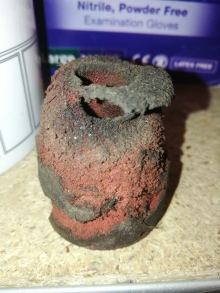
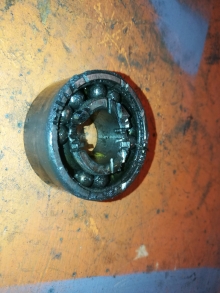
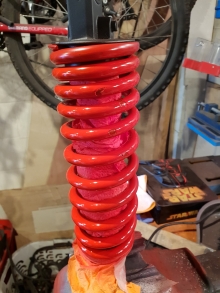
Removing the wheel bearings for powder coating turned out to be a gargantuan task necesitating, in the end, the complete destruction of one of them along with many and various tools substituting for the Haynes manual advised copper drift. Eventually, with one nearly broken finger the wheels and rear spring were sent for powder coating but the cursed spring compressors slipping soon ruined the spring's coating and the chips in it are visible from > 1.5m.

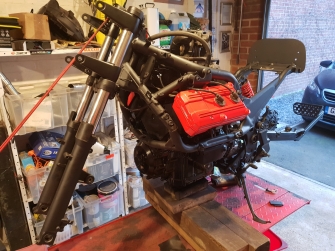
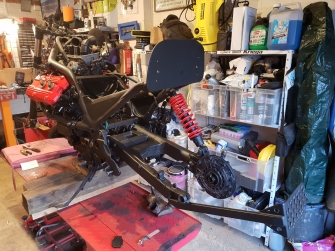
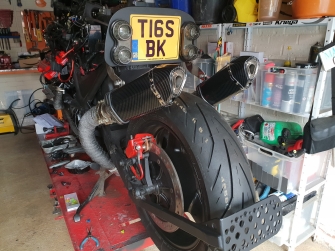
So after this we managed to start getting some big bits vaguely in place.
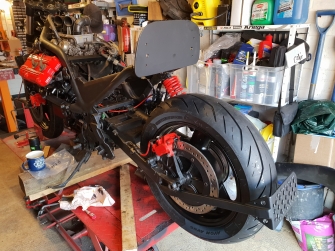
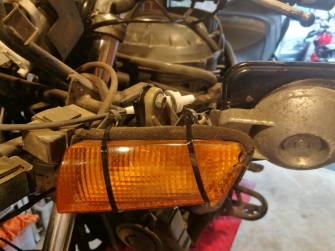
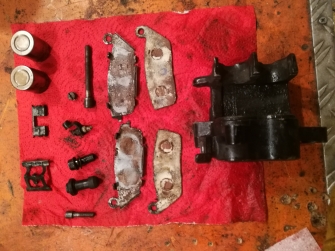
Starting to look good alas somehow the idiocy of Dr. Tigger meant he put the back calliper on the left front and the left front on the back. Just couldn't believe they fitted alas the brake line attachement points were different so the new red braided brake lines wouldn't fit. Still took him hours of staring at it to figure it out! Worrying isn't it?!
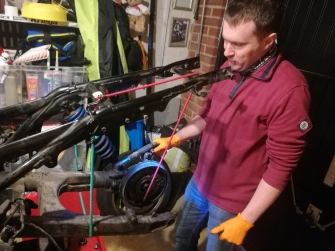
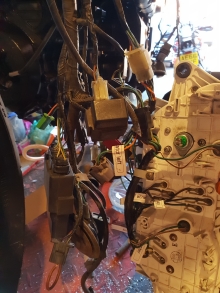
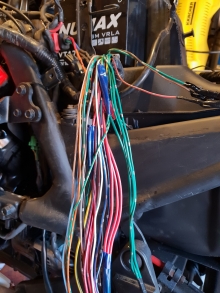
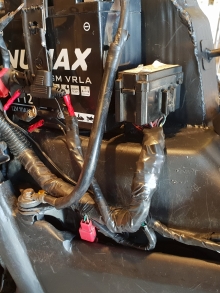
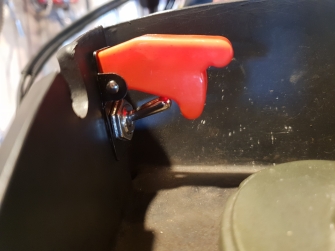
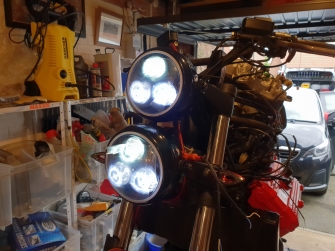
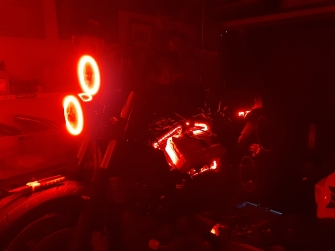
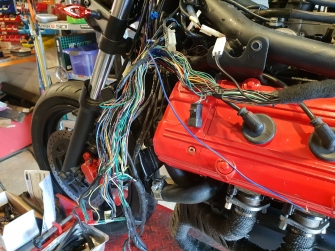
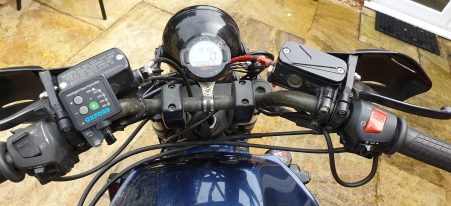
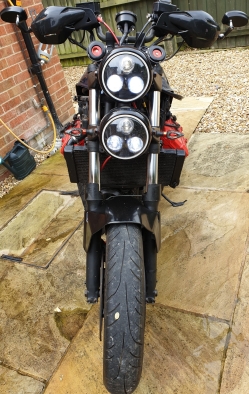
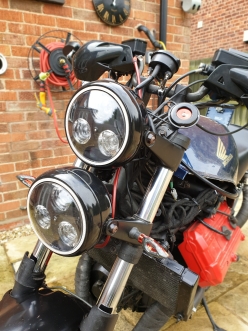
After this debarcle it was time to start addressing the behemoth task of wiring. Bedpan has A LOT more electronics than EDie. Despite putting some new wiring in for things like new lights, heated grips and vanity lights (red LEDs around the engine and red angel eye halos around the headlights) we still cut out several yards of wire out of the loom. Whole thing was made more frustrating by a batch of bad solder and one dirty connection. That and the new lights clashed with the old ignition switch so we decided to change the whole thing out for a missle switch under the lockable fuel flap. Topgunerific!


Yes yes all looks good. NO! It's all just a little bit of history repeating!
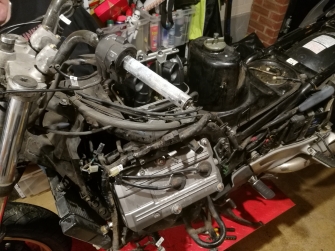
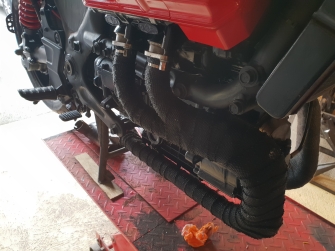
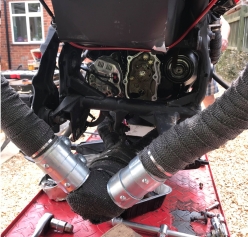
Right hand cylinders not firing at all. Unlike EDie, who had a broken HT lead causing her to run on one cylinder, Bedpan has both right hand cylinders not firing depite compression and spark. Best guess was that somehow, despite working perfectly on removal and no fiddling undertaken, a blockage or some sort of component failure affecting both right had carburettas as occured. ARRRRRGH! Soooo frustrating. To save our ears during testing we popped on the freshly wrapped downpipes and ran the rear wheel through all gears. Fortunately wiring up the new digital speedo seems to have gone better.

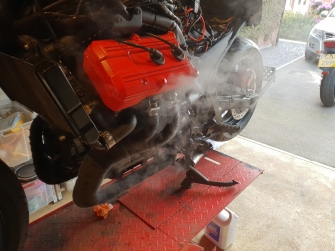
There was little option bar check individually on the three components of bang, air, fuel and spark plus compression. Spark was good, compression was perfect and even across all cylinders which left fuel and air. We took the carbs off, took off what bits we could, put our lips together a blew through any holes we could. Once back on and revved to high heaven, provoking a neighbour complaint, the right hand downpipes started to get hot! By now we could live without being certain of the problem and take solace in the solution. Surely this, as with EDie would be the project's only major snag? Time for an oil changeand fit the exhausts.
Well chuffed with the back's look and whilst basking in the pleasure of good design smoke started to come from wiring loom! Some stupid confusion between a coomon popsitive rail and common earth had caused melting and and lot of rewiring was needed. As we had by now figured out our soldering problem we decided to take out most of the crimp connectors in favour of proper soldered joins. Just tidying up. What could go wrong especially as the pressure was on to get Bedpan rideable as the EDRiders HQ move was but a few weeks away?
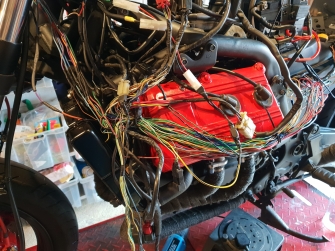
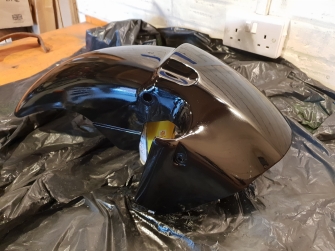
So all the tidying was done and the battery was reconnected and the bike had power; power when the new missile ignition switch was in off! No turning over, some things working and some not. What had we done? We didn't think we'd changed the wiring connections bar sorting out the short. Our fear was we had fried the regulator/rectifier; many hundreds of pounds to replace. Another whole day with the multimeter and ever increasing bald spots through tearing and we finally found that Dr. Twathead had muddled up a red wire with a red with black dashes when rewiring the fuse box. When corrected everything was back to working as it should. He made up for his error with a nice front mudguard modification and paintjob. Time for a test ride!
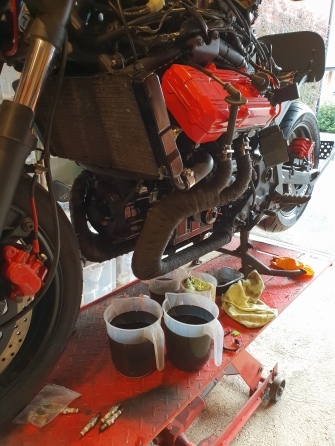
As we noticed on the test ride just pootling twice up a cul-de-sac probably wasn't a two hundred mile per hour opportunity but setting up the new digital dash could wait until after the move. Unfortunately once off the ramp we noticed that we hadn't just been messy changing the oil, we had an engine oil leak! Oh yes, the carb problem was not this project's only major snag. Further investigation revealed a constant driping coming from the gear change dahft assembly oil seal; something that can only be got to with either the engine out of with great fiddliness with the swing off. Just when we thought the cosmetics were the one outstanding job! ARRRRGH!!! Anyway this could at least wait until after the move and when we had a whole day.

To remove the swingarm and change the gear change shaft oil seal should have been a hour job. After nearly 6 we were done. Considering the oil seal in question was in two bits we were fairly confident we'd foundthe culprit. Whilst there we reglued the left grip and changed the speedo settings to more acurately reflect our speed. He smelt like he was runnign a bit rich but the plan was always to get the carbs serviced, cleaned and balanced at some point so we weren't worried about that, The next morning there was no oil under him. Next......MOT? Ooooooof. Nervous! After that, if successful is to start the faux fuel tank mods to cover BedPan's bits.
After more tinkering and a financial crisis Bedpan was got as good as we could and sold. To be completely honest we had run out of time, love and will with her. I, Dr Tigger, am ashamed to say so but it is true. Too many things kept going wrong with her one after another and the task of getting her completely sorted became too great especially as we had no time or money to do so. We wish her and her new owner all the best. What can we say? Close but no cigar! Nevertheless the design formula can been seen evolving from Edie.

| Visitor Counter: | |||||||
 |  | |  |  |  | ||